The lost-wax casting process of silicone molds for silicone molds: mainly for the reproduction of metal and other handicrafts, a material that chooses to overturn molds is mold silicone.
Lost Wax Casting Jewelry Process – Silicone Molds
The lost wax casting process commonly used in the modern jewelry manufacturing industry is developed from ancient casting processes. In the late Neolithic Age more than 5,000 years ago, ancient Chinese craftsmen widely used the lost wax casting process in the manufacture of bronze ware. According to the characteristics of beeswax’s plasticity and thermal volatility, the craftsmen at that time first carved the beeswax into a wax mold of the desired shape, then wrapped clay and reserved a small hole outside the wax mold, and baked it after drying to make the wax mold vaporize and volatilize. At the same time, the clay becomes a ceramic shell, and the inner wall of the shell leaves a negative mold of the wax mold. At this time, the molten metal is injected into the shell along the small hole, and the shell is broken after cooling to obtain the required metal billet. The basic principles of modern lost wax casting technology are the same, but more complex***. This is mainly reflected in the stricter requirements for the type and position of the wax model. The acquisition of wax mold in modern technology is not only the direct engraving of wax, but also the negative mold can be obtained by silicone molding of the metal original mold (plate), and then the wax mold can be obtained by injecting wax from the silicone negative mold. The casting material is no longer clay, but cast plaster instead. Such products are much finer than ancient castings.
The Xia, Shang and Zhou dynasties created a splendid bronze culture, and a large number of bronze castings with complex shapes, elaborate decorations and superb craftsmanship have been handed down to this day. During the Spring and Autumn Period, advanced technologies such as lost wax method and stacked investment casting method were created.In the Warring States Period, the gilding process appeared again. In the late Spring and Autumn Period, China entered the early Iron Age, and by the Warring States Period, iron smelting was very popular. In the Western Han Dynasty, iron smelting became a big handicraft industry department, and the technology of frying iron was used at that time.In the Southern and Northern Dynasties, the new technology of steel-making by pouring steel was invented, and the blasting facilities of the furnace were also invented.
During the Shang Dynasty, our ancestors were very proficient in the technology of smelting bronze ware. In the Spring and Autumn Period, they entered the Iron Age, and even after the middle of the Warring States Period, they developed a complete set of steel-making technologies, including carburizing steel, smelting and smelting. Steel, fried steel, poured steel, etc. Because China is the first country in the world to use blast furnace ironmaking, the ironmaking technology in ancient times was at a high level. Secondly, there is a relatively strong blast system at a very early stage to strengthen the temperature of the furnace, which can shorten the smelting time. After going through the process of carburizing steel, smelting steel, and frying steel, the invention of “steel filling method” is an important milestone. The method is to select high-quality iron ore, after smelting pig iron, pour the liquid pig iron on the wrought iron, and melt the iron to carburize the iron to become steel. This method not only speeds up the time of iron smelting and reduces the number of forgings, but also has a simple and convenient operation method, and has a profound impact on the subsequent steelmaking technology.
Modern lost wax casting is currently the main method of jewelry production
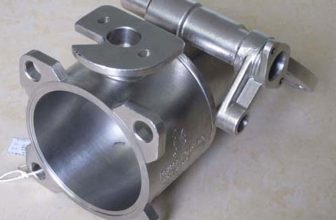
Lost wax casting is essentially metal casting in machining methods. The application of high-quality casting to the mass production of jewelry is a prominent feature of modern Lost Wax Casting Jewelry. The lost wax casting of jewelry manufacturing can meet the needs of mass production, and can also take into account the changes in styles or varieties, so it occupies an important position in the production methods of jewelry manufacturing. The casting methods of lost wax casting include vacuum suction casting, centrifugal casting, vacuum pressure casting and vacuum centrifugal casting, etc. It is the main means of mass production in the jewelry manufacturing industry at present.
The process of lost wax casting is: open the original mold (usually silver plate) with mold silicone; after cutting the plastic mold with a sharp blade in a certain order, take out the silver plate to obtain a hollow plastic mold; inject into the hollow plastic mold After the liquid wax is solidified, open the silicone rubber mold and take out the wax mold; after trimming the wax mold, plant wax trees in a certain arrangement in the wax mold, and put it into a steel sleeve to pour high-temperature gypsum slurry;After natural hardening and drying according to a certain heating period, the molten metal is cast (the principle of positive pressure or negative pressure can be used for casting); after the metal is cooled, the plaster mold is placed in cold water for frying and washing.
The lower blank is rolled and polished; the finished product is obtained after mold execution, inlay and surface treatment. The positive pressure and negative pressure casting mentioned above refers to the pressure state inside the casting mold during the casting process. Positive pressure casting is represented by centrifugal casting. During the casting process, when the molten metal enters the mold, the pressure in the mold is atmospheric pressure, so that the metal must overcome the atmospheric pressure to make the liquid metal enter the mold. The crucible and the mold are installed on the high-speed rotating disc, and the liquid metal flows at a high speed in the normal (radial) direction of the disc by the action of centrifugal force, and the injection effect enters the mold – that is, in the process of “positive pressure casting” When the molten metal enters the mold cavity, the internal pressure of the mold is greater than the external pressure of the mold, and the difference between the two is greater than 0, so it is called “positive pressure casting”; “negative pressure casting” is typical of vacuum suction casting, during the casting process , When the molten metal enters the mold, the pressure inside the mold is less than the pressure outside the mold, and the difference between the two is less than 0, so it is called “negative pressure casting” – of course, the negative pressure in the mold must be completed by a vacuum pump connected to the mold. The liquid metal naturally enters the mold under the action of atmospheric pressure.
From the actual production effect, there is no obvious difference between positive pressure casting and negative pressure casting, but in general, positive pressure casting is suitable for occasions with high output, while negative pressure casting is suitable for medium or small output. occasion.
Vacuum centrifugal casting is a casting method that combines the advantages of positive pressure casting and negative pressure casting. In its essence, vacuum centrifugal casting belongs to negative pressure casting. Although the “vacuum” here does not only refer to the inside of the mold, the molten metal and its container – the crucible are also in a vacuum state, but according to our definition of “negative pressure casting” above, during the casting process, the pressure inside the mold is less than atmospheric pressure Therefore, it is reasonable to classify “vacuum centrifugal casting” as “negative pressure casting”.
Vacuum pressure casting is also a casting method that combines the advantages of positive pressure and negative pressure casting. In this casting method, the “vacuum” position is on the side of the plaster mold, and the “pressurization” is on the side of the crucible that holds the molten metal. According to the classification method we defined above, since the internal pressure of the casting mold (plaster mold) of this casting method is less than atmospheric pressure during the casting process, it should also be classified as “negative pressure casting”.
A typical lost wax casting (lost wax casting) process is shown above. It can be seen from the figure that the lost wax casting is completed through the conversion of the male mold – the female mold – the male mold – the female mold – the male mold, that is to say, the male mold has gone through the silver plate – wax Die – Three transformations of the finished blank. In these three conversions, certain errors and deformations are inevitable. But a reasonable lost-wax casting process can keep these errors and distortions to a minimum.
The process flow of lost wax casting is: opening silicone mold – injecting wax (mold) – trimming wax mold (welding wax mold) – planting wax tree (- weighing) – pouring gypsum cylinder – gypsum vacuuming – – Natural setting of gypsum – baking gypsum – gold melting, casting – frying gypsum – rinsing, pickling, cleaning (–weighing) – cutting blanks (–rolling). Each process is described below.
Open the silicone mold (choose mold silicone)
Silicone mold opening is a very demanding technology in jewelry factories, because the quality of silicone mold opening directly affects the quality of wax molds and metal blanks, and also directly affects the life of plastic molds.
The plastic mold created by the skilled mold maker has basically no deformation, breakage and cloak after wax injection. It basically does not need wax repair and welding wax, which can save a lot of repairing time and achieve higher production efficiency.The tools used to open the plastic mold are relatively simple, such as scalpels and blades, tweezers, scissors, needle-nose pliers, etc. Note that beginners must use a new blade when using a scalpel, so that it is not easy to scratch the fingers. In order to ensure the lubrication between the blade and the silicone mold during the cutting process, you can dip the blade with water or detergent (but never dip it in oil, because the oil will make the mold hard and brittle).
The plastic mold usually adopts the four-leg positioning method, that is to say, the opened plastic mold has four feet that fit and fix each other, and the part between the four feet is cut with straight lines or curved lines. The general mold opening sequence (taking the ring silicone mold as an example) is as follows:
Cut the head and one foot from the side under the knife. First cut two straight edges, the maximum size is 3~5mm (which can be adjusted according to the size of the plastic mold), and then the knife is cut in a zigzag shape, which can make the silicone mold better when the mold is split.
Wax Injection
After the plastic mold is opened, the wax injection operation can be carried out. The wax injection operation should pay attention to factors such as wax temperature, pressure and compression of the plastic mold.
The wax used to make the wax model is generally blue model paraffin, its melting temperature is about 60 ℃, and the wax injection temperature is about 65 ℃ (the temperature resistance of the silicone mold is 150 degrees). There are also some other colors of paraffin with slightly different properties. The wax temperature and injection pressure are determined by the wax injection machine. There are usually two types of wax injection machines: air pressure type and vacuum type. The wax injection principle of these two types of wax injection machines is basically similar, that is, the molten wax is injected into the plastic mold by air pressure. The difference between the two is that the vacuum wax injection machine can first vacuum the plastic mold and inject wax into the plastic mold; while the air pressure wax injection machine can only inject wax directly into the plastic mold. Therefore, it is usually easier to master the vacuum type wax injection machine, while the air pressure type wax injection machine requires certain experience.
The heater and temperature sensor in the wax injection machine can make the wax liquid reach and maintain a certain temperature. Usually, the temperature of the wax in the wax injection machine should be kept between 70 and 75 °C, which can ensure the fluidity of the wax liquid. If the temperature is too low, the wax liquid is not easy to fill the wax mold, resulting in incomplete wax mold; on the contrary, the wax liquid temperature is too high, which will cause the wax liquid to overflow from the gap of the plastic mold or from the wax injection port, which is easy to form flash or burn. finger.
The pressure in the wax cylinder of the wax injection machine is provided by an external air pump, which should generally be kept between 0.5~0.7at (or kgf/cm2), that is, 0.051~0.071Bar. It can also be adjusted according to the volume and complexity of the wax mold. Adjustment.
Before injecting wax, the silicone mold should be opened first to check the integrity and cleanliness of the plastic mold. If it is a used silicone mold, you should spray dewaxing agent (you can also sprinkle a small amount of talc powder) on the silicone mold, especially the small and complex shapes, to facilitate the removal of the wax mold; secondly, the wax injection machine should be preheated, Turn on the air pump and adjust the pressure and temperature.
When injecting wax, use both hands to clamp the silicone mold in the splint (can be a glass plate, wood board, aluminum plate, etc.) Push the mouth in parallel, hold the wax injection nozzle firmly and keep your hands still, gently press the wax injection switch with your feet and release it immediately. There is a bottom, the bottom of the mold should be pulled out first), and the wax mold is taken out. After the wax mold is taken out, check it carefully. If there are serious problems such as missing edges and broken feet, such a wax mold is a waste product. If it is some relatively small defects, the wax model should be trimmed.
Trimming The Wax Model
Generally speaking, the wax model taken out after wax injection will have some problems more or less, such as burrs, multiple edges, broken claws, blisters visible to the naked eye, partial or overall structural deformation, small holes, and unclear flower head lines. , flower head edge and so on. For defects such as flash, multiple edges, unclear flower heads, and flower heads overlap, use a surgical blade to trim the light; for trachoma and broken claws, you can use a welding wax device to repair; small holes can be penetrated with a welding needle; for wax The deformation of the mold can be corrected in hot water at 40~50℃.
In addition, for rings with different hand sizes, if you wait until the mold is executed and then change the ring, it will undoubtedly be labor-intensive and material-intensive. Therefore, the general production enterprises directly change the finger ring when repairing the wax mold. It is very convenient to use a welding wax device to change the finger ring. After welding, you can trim the welding seam with a blade
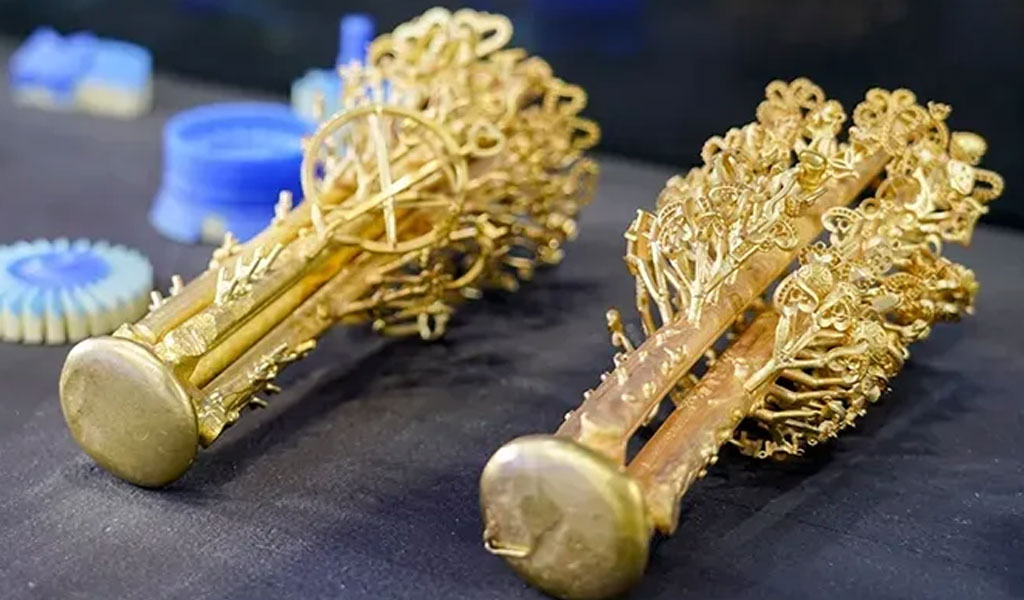
Plant Wax Tree
After the wax model has been trimmed, a wax tree needs to be planted before further operations can be carried out.
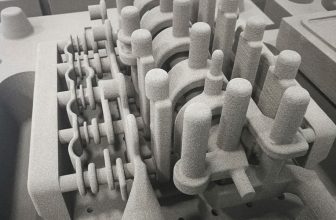
To plant a wax tree is to weld the prepared wax mold to a wax rod in layers along the circumferential direction with a wax welding device in a certain order, so that you can finally get a wax tree with a shape similar to a big tree. Wax trees are irrigated with gypsum and other processes. The basic requirement for planting wax trees is that the wax molds should be arranged in an orderly manner. The key is that the wax molds should not be in contact with each other, so as to maintain a certain gap and weld the wax molds on the wax tree as much as possible. It is necessary to “plant” as many wax molds as possible on a wax tree to meet the needs of mass production.
Wax trees must be “planted” on a circular rubber base. The diameter of this rubber chassis is matched to the inner diameter of the stainless steel barrel. The diameter of the general rubber chassis is 3 inches, 3.5 inches and 4 inches. There is a protruding circular concave hole in the center of the chassis, and the diameter of the concave hole is equivalent to the diameter of the wax rod of the wax tree. The first step of “planting a wax tree” is to dip the head of the wax stick in some melted wax liquid, and insert it into the concave hole of the chassis while it is still hot, so that the wax stick and the concave hole are firmly combined. The second step is to weld the wax pattern on the wax stick layer by layer, starting from the bottom of the wax stick (from bottom to top) or from the top of the wax stick (from top to bottom). If the technique of “planting trees” is relatively skilled, there is little difference between the two methods; however, there are generally more methods that start from the head of the wax stick (from top to bottom), because the great advantage of this method is that it can Preventing molten wax dripping onto the welded wax mold can avoid unnecessary rework caused by wax dripping.
The operation process of planting wax trees should pay attention to the following problems.
- There is generally a 45° angle between the wax model water channel of the wax tree and the wax stick, that is to say, the direction of the wax model is inclined upward. Only in this way can the gold water be injected into the plaster mold smoothly. This angle can be adjusted appropriately according to the size and complexity of the wax model. Small and complex wax models can reduce the included angle; on the contrary, larger wax models can maximize the included angle.
- Before planting wax trees, the rubber chassis should be weighed first. After the wax tree is planted, it is weighed again. The weight of the wax tree can be calculated by subtracting the results of these two weighings. Converting the weight of the wax tree to the weight of the metal by the ratio of the density of the paraffin to the cast metal gives an estimate of how much metal is needed for casting.
- After the wax tree is planted, it is necessary to check whether the wax model has been welded firmly. If it is not welded firmly, it is easy to cause the wax mold to fall off when pouring plaster, which affects the casting process. After getting drunk, you should check whether there is enough space between the wax molds. If the wax molds are attached together, they should be separated; if there are dripping wax drops on the wax tree, they should be repaired with a blade.
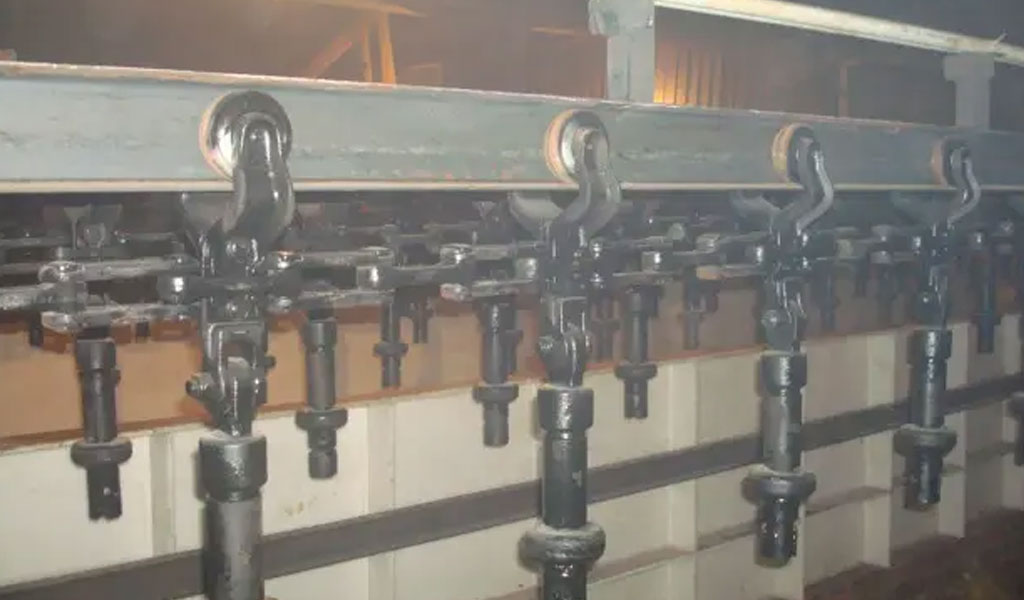
Pour plaster and vacuum
Put the wax tree on the stainless steel tube (steel bell) together with the chassis, and wrap the single-sided tape on the outside of the steel bell (the tape should be about 20cm higher than the upper edge of the steel bell when drunk) for use.
- Mixing gypsum slurry: Prepare the corresponding weight of gypsum powder and water according to the specific volume of the steel bell (if there is no distilled water, tap water can also be used). Generally, the ratio of gypsum powder and water is 2~2.5:1 (the gypsum slurry at this time) The specific gravity is about 2), which can be adjusted according to the dry and wet climate, cold and warm, as well as the size and complexity of the casting mold. The water temperature is suitable between 20 and 25 °C. First put the water into the mixing container, start the mixer, gradually put in the gypsum powder, and stir for about 10 minutes, then the first vacuuming (1~2 minutes) can be performed.
- Pour gypsum: The gypsum slurry after vacuuming is slowly injected along the inner wall of the steel bell. Do not pour the gypsum slurry directly on the wax tree until the gypsum slurry is about 1cm below the wax tree. Immediately carry out the second vacuuming. After vacuuming for 2 minutes, leave it naturally for 6 to 12 hours to ensure the solidification of the gypsum.
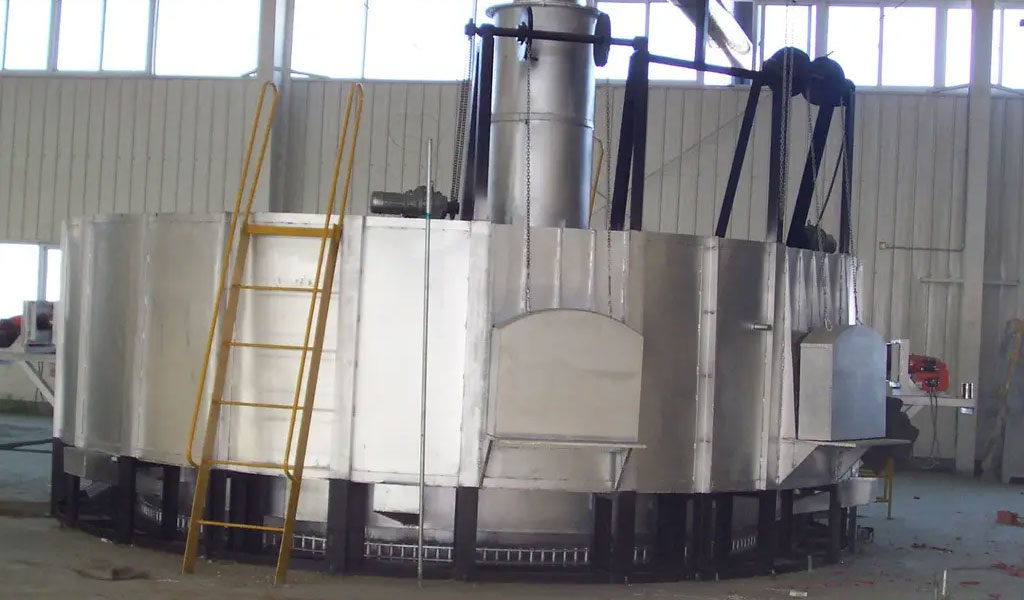
Baking plaster 8 Melting gold, casting
The baking of plaster mold is an important process to ensure the normal operation of casting. Generally speaking, the mold baking time for 18K gold is 6 to 12 hours, and the mold baking time for platinum is 12 to 20 hours. The main functions of baking are: dewaxing, drying and casting insulation. Taking the baking of 18K gold as an example, the dewaxing temperature is 0~350℃, and the holding time is 2 hours; the drying temperature is 350~700℃, and the holding time is 2~3 hours; the casting temperature is 600~500℃, and the holding time is 1~3 hours. 2 hours.
Baking Gypsum
The general baking process is: first, preheat the resistance furnace to the initial temperature, put the nozzle of the plaster mold down into the furnace, so that the wax liquid can flow out and evaporate; Gradually ramp up/down and constant temperature at hourly intervals. Note that the heating (or cooling) speed should be kept at 100~200℃/hour, otherwise the heating will easily form cracks in the plaster mold, which may cause damage or scrapping of the plaster mold in serious cases. No ***, affecting the quality of castings. The baking time of the plaster mold depends mainly on the size and complexity of the golden tree and can be adjusted according to the specific situation.
Melting And Casting
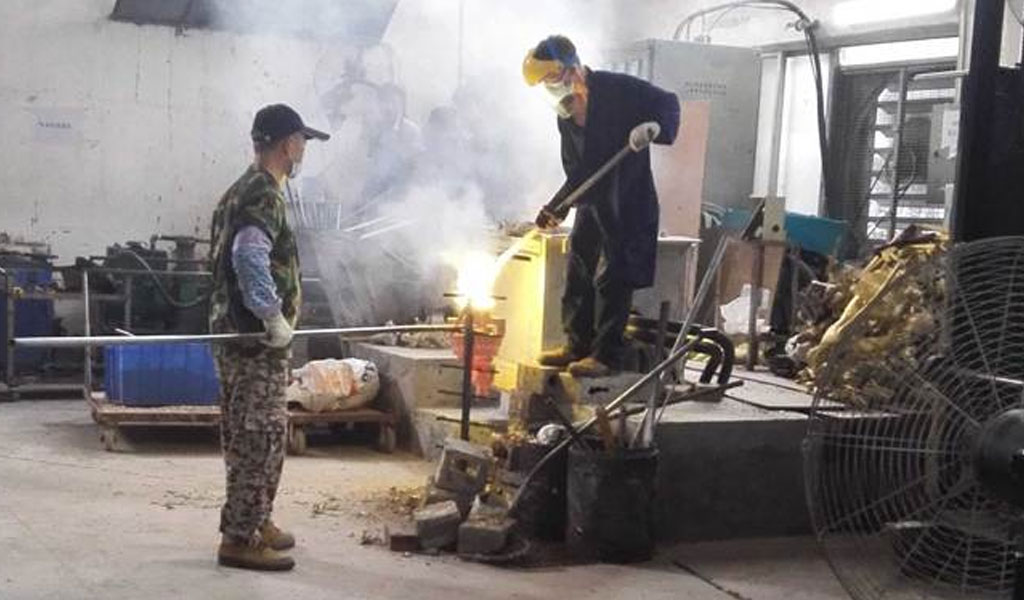
Vacuum Caster Casting: When the plaster cast is nearing the end of the bake, the gold that has been prepared begins to melt and remains molten. After the gypsum mold is kept warm, place an asbestos washer on the mouth of the suction casting machine, take the steel bell out of the electric furnace quickly, put the nozzle upwards into the mouth of the vacuum suction casting machine to be cast, and gently step on the suction casting plate while pouring gold water. Casting is completed. After the casting is completed, pay attention to the air switch to deflate.
Vacuum induction centrifugal casting machine casting: first open the machine cover, add the prepared gold nuggets into the gold melting crucible, cover the machine cover, set the preheating temperature, and start melting gold. When it reaches a nearly molten state, put it into a plaster mold that has been fully insulated, cover the machine cover, first vacuumize, then heat it to the set temperature, and set the centrifugal acceleration and stable speed; after reaching the set temperature, the machine automatically enters the centrifugal Casting state, about 1 to 2 minutes to complete. After the casting is completed, pay attention to the air switch to deflate.
Note: The starting plate is the preparation process of lost wax casting. Since the original plate made by the starting master will be repeatedly cast, the quality of the starting plate determines the quality of the lost wax casting.
The most important requirement for the operation of the original version is “faithfulness to the original appearance”, that is, the production of the original version must strictly comply with the requirements of the design drawings. To do this, the operator must first use three-dimensional thinking to deeply experience and understand the designer’s ideas and themes, and should also take into account the integrity, coordination, aesthetics and operability of the original. Sometimes due to unreasonable elements in the design, the designer should negotiate with the designer according to the actual situation and adjust the design at any time, so that the original design tends to be perfect. For example, the size and shape of the main stone setting should be in harmony with the overall structure of the jewelry; the convex and concave surfaces and various lines should be smooth and smooth; the layout of the flower decoration and the auxiliary stone setting should be reasonable; should be smooth and shiny…
The method of starting the plate is generally based on making silver plates, and sometimes special waxes are used to make them.
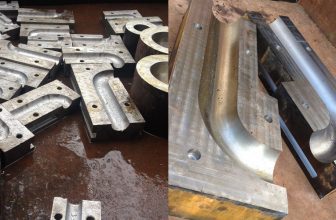
Lost wax casting requires stencils, while batch production of stencils requires rubber molds made with silver stencils. The production of the silver plate completely relies on the manual skills of the plate maker. Through sawing, filing, welding, and chiseling, the original plate with clear edges and corners, clear lines and smooth surface is produced with 925 silver. From this point of view, the starting process is similar to the hand-making process of jewelry. However, the starting version has higher technological requirements than the general hand-made. The starting version requires that the surface, hollow parts and back of the jewelry are clean and free of traces. It requires that the structure of each part of the silver version is reasonable, and the position and size of the inlaid gemstones are accurate. Welding wire, nailing around the nail setting hole, grooves on the inner wall of the groove setting, etc.), so the starting process is a process with high technological requirements in jewelry making.
For silver plates with complex structures, methods such as swinging blanks are sometimes used to make them. The blanking is a very important technology in the starting process. For silver plates with many parts, it is very difficult to use general welding methods, and it is even more difficult if the parts are very small. For example, the welding of many small and large sockets in the disc setting, the welding between the small sockets of the spherical broken diamond claw set, the welding of the small socket and the frame, the middle flower of two or more layers of fancy chain cards Welding of leaves and large and small inlays, etc. The production of these complex styles of silver plates must rely on the blank to complete.
The general process of billeting is:
Stencils are made using waxes with special ingredients. These waxes are generally divided into three types according to their hardness. Take the Ferris brand engraving wax made in the United States as an example. No. 1 wax is green and has high hardness, which is suitable for the production of small wax plates; No. 2 wax is purple and has moderate hardness. , suitable for the production of more complex structure wax plate; No. 3 is blue, low hardness, suitable for the production of simple structure general wax plate. Usually the wax version of the ring uses wax tubes (generally there are three types, as shown in Figures (1)~(3): one has a flat surface on the outer circle, and the hollow part is cylindrical; one is a hollow cylinder; one is an eccentric hollow cylinder ); use block, solid square column (or polygonal column), cylindrical wax material (as shown on the left) for chain cards, earrings, chain links, etc.; use thinner wax pieces for large and small inserts; use filigree and claws Wax wire of various diameters.
Wax Plate (Carved Wax)
The tools used in carving wax include various shapes of carving knives (such as sharp knives, medium sharp knives, broad flat knives, round knives, crescent knives, etc.) angular, concave round, concave sphere, etc.) and saws, files, etc. similar to handcraft but smaller in size, also use wax waxers (similar to electric soldering irons), wax melters, hoists and needles , and sometimes use the latest car wax machine and wax engraving machine and other equipment.
The following is a brief introduction to the operation process of wax carving, taking the production of a wax plate of a male ring with a claw setting (with a side stone) as an example.
- Prepare the No. 3 wax tube. After leaving a margin according to the size in the design drawing, use a hacksaw to saw the next section of the wax tube, and file the two end faces.
- Prepare wax sheets and wax silk according to the size of the drawings, and make parts of large and small inlays, flower decorations and flowers and leaves.
- Drill holes on the ring table and the two sides of the flower head corresponding to the size of the inlay and the position of the inlaid filigree and flower leaves, saw it into a shape slightly smaller than the actual size, and then trim it to the appropriate shape and size with a file and a carving knife.
- Weld the inserts, filaments and mosaic leaves in the corresponding positions with a wax welding device, carefully pick off the welding traces with a carving knife, and then flatten them with a pressing knife.
- Correct the shape of the stencil in hot water at about 50°C.
- Calender all parts of the whole wax plate with a wax carving knife.
The wax carving method can be applied to the production of various styles of wax molds, especially when the decorative floral ornaments are more complex and slender, the lines are round and smooth, and the original version that needs to be carved and decorated can be used.